I am green builder. I have never held a construction job and have little experience in construction. When I started the actual physical construction part of the project, I thought it would only take 3 months to do everything. Its been 1 year and 3 months now and I have 6 months to go.
I also thought I could do this project. But in hindsight I see that I couldn't and was oblivious to this fact. Luckily I come from a long line of successful builders. Dad who lives out in the mid-west 2000 miles away is a structural engineer and a carpenter and had helped build many houses in Florida. My grandfather and great grandfather built many houses in Pennsylvania as well and owned a lumber yard. In short building is in my genes.
The cedar porch needed a 350 sq ft concrete slab and the garage needed a 245 sq ft pad added on to the existing slab. I decided to first attack the existing patio where the cedar covered porch would go. To do this I made use of a brand new $240 electric jack hammer I had picked up from harbor freight.
It didn't take long for me to learn it was only necessary to apply the jack hammer in key locations to get concrete to crack which made the demolition process faster. However I also learned that there was rebar and wire mesh in the concrete that made it difficult in separating the chunks. The demolition for the 26 x 10 patio took 16 hours. And yes there are easier ways of demolishing concrete. Luckily it was December and not broiling hot outside.

The next step was to put the batter boards up and use string to mark the extents of the pad. By using the building plans as a reference the string perimeter was adjusted to match. Precise 90 degree angles in the string perimeter were made using the 3-4-5 triangle technique. Except in my case the slab was in the form of a rectangle with two corners cut off so that extra strings were setup to match this feature.

Next I transferred the results from the batter boards to stakes and string to outline the perimeter and then used a can of spray paint to mark the perimeter. This allowed me to accurately excavate the trench for the footers and the forms with a shovel.

Now it was time to build the forms. I had been experimenting with wood working for couple of years and had made two nice pieces of furniture. A walnut and red oak entertainment center and a cedar BBQ bench. In fact the cedar BBQ bench was so nice and pretty it made me feel that it needed a structure to protect it when it was outside. Hence the cedar covered porch.
As an electrical engineer I know this as scope creep....which is a dirty word in to project management and results in schedule slips, cost over runs and the customer getting something he didn't ask for. In my case there were several heated conversations between the customer (me) and the manger (myself) and the employee (I) because of this. But everything is ok now because the schedule was thrown out the window, the customer is getting product that is better than he initially imagined and the cost is expected to be half of what a contractor would charge.
The point I'm trying to make though is that fine precision wood working skills which is what I possessed isn't needed in the building of throwaway concrete forms. Shown below are the resulting forms of professionals that do this kind of work for a living.
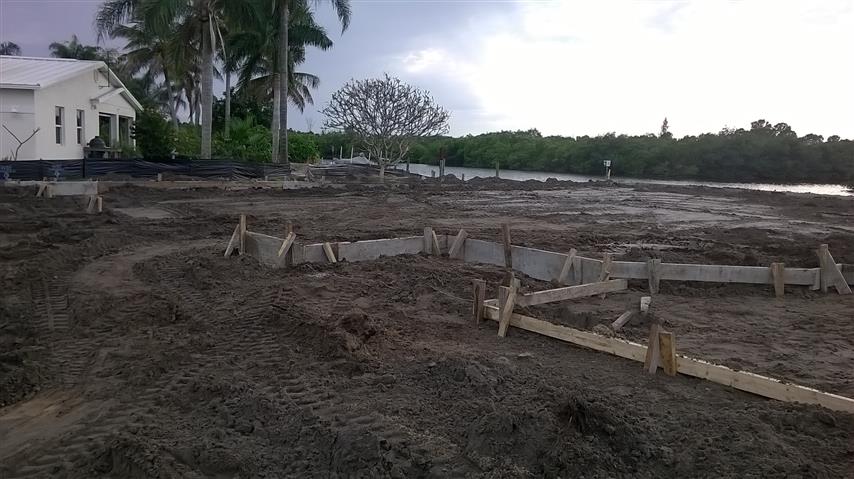
I went ahead and built forms out of 5/8" plywood and 2x4 lumber. I did not use the technique above where the dirt trench is used as part of the form to shape both sides of the footer. Instead I made 16" forms to make the one side of the 16" deep footers and the dirt trench formed the other side. With the forms made, I installed them around the perimeter and leveled them with a straight level.
During the time that I spent working on the project, dad had packed his tools up in his truck and made the trip to Florida. I didn't know it then but his arrival at the job site made this project possible.
When he arrived he took a look at the forms I had made and said "what are you building? a piano?" We laughed. The expression he's building a piano is used to convey that unnecessary work is being done to accomplish the task at hand. That and it didn't help that the slab kind of looked piano shaped.
The forms were made with tight tolerances and were precise in all dimensions. They were square, level and true. Only problem is I wasn't really sure how to brace them. To brace them I had used 2x2 stakes and screwed them to the forms. The flimsy stakes and screw idea was a screw up. I thought screws were superior to nails because I had read in books that pounding nails into forms would make them out of true. Screws don't disturb the forms at all. What I hadn't foreseen was that I would have to take the forms apart and put in proper kickers that my dad recommended. But dirt had gotten in the heads of the screws and they were not coming out! This meant it was time to break out the harbor freight sawzall and start cutting! Read what happens in the next blog
Happy Building
The Dr


No comments:
Post a Comment